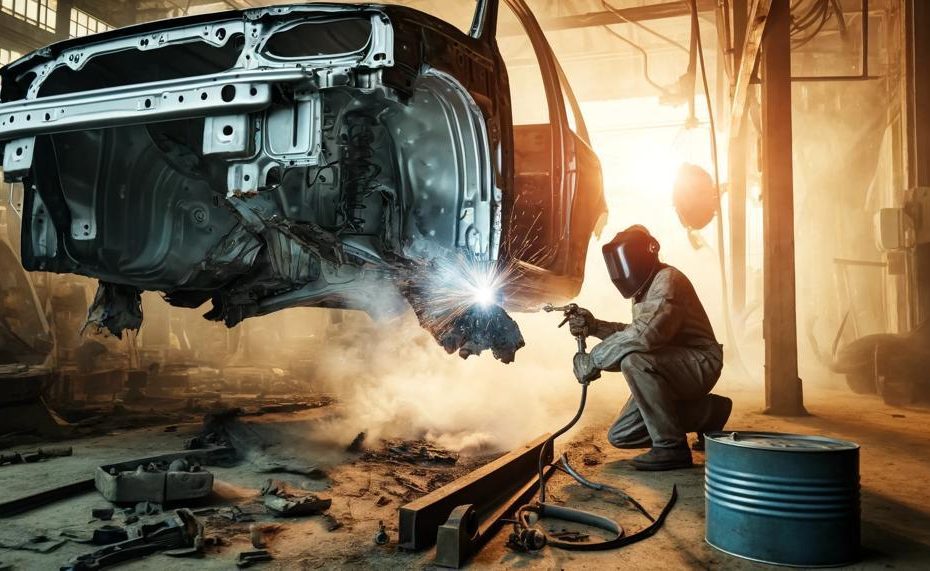
Whether you’re dealing with rust, damage from an accident, or just looking to give your vehicle a facelift, the task of replacing rocker panels can seem daunting, especially if you don’t have access to welding equipment or prefer not to use it for any reason.
But fear not, because this guide is designed to walk you through an innovative no-weld method that not only simplifies the process but also ensures a sturdy and seamless finish, just like a professional job. We’ll explore the tools and materials you’ll need, step-by-step instructions, and key tips and tricks to make your rocker panel replacement project a resounding success.
Here’s a sneak peek of what you’ll learn:
- The Essential Toolkit: Discover the tools and materials that are absolute must-haves for this project.
- Step-by-Step Guide: Detailed, easy-to-follow instructions that take you from preparation to the final touches.
- Tips and Tricks: Insider insights to help you avoid common pitfalls and achieve a professional-grade outcome.
- Maintenance and Care: Advice on how to maintain your newly installed rocker panels to ensure they last as long as possible.
Whether you’re a seasoned DIYer looking for a new challenge or a beginner wanting to save on repair costs, this guide is tailored to help you achieve a great result without the complexity of welding.
So, let’s dive in and transform your vehicle with confidence and finesse.
Contents
- 1 How to Install Rocker Panels Without Welding
- 2 Slip-On Rocker Panels: Attachment Methods And Tools
- 3 Preparing The Surface: Removing Rust And Damage
- 4 Installation Steps: Detaching, Cutting, And Cleaning
- 5 Mounting Options: Fasteners Or Adhesive?
- 6 Finishing Touches: Priming, Painting, And Undercoating
- 7 Considerations For Durability And Resale Value
- 8 Preparing The Surface: Removing Rust And Damage
- 9 Installation Steps: Detaching, Cutting, And Cleaning
- 10 Mounting Options: Fasteners Or Adhesive?
- 11 Finishing Touches: Priming, Painting, And Undercoating
- 12 Considerations For Durability And Resale Value
- 13 Conclusion
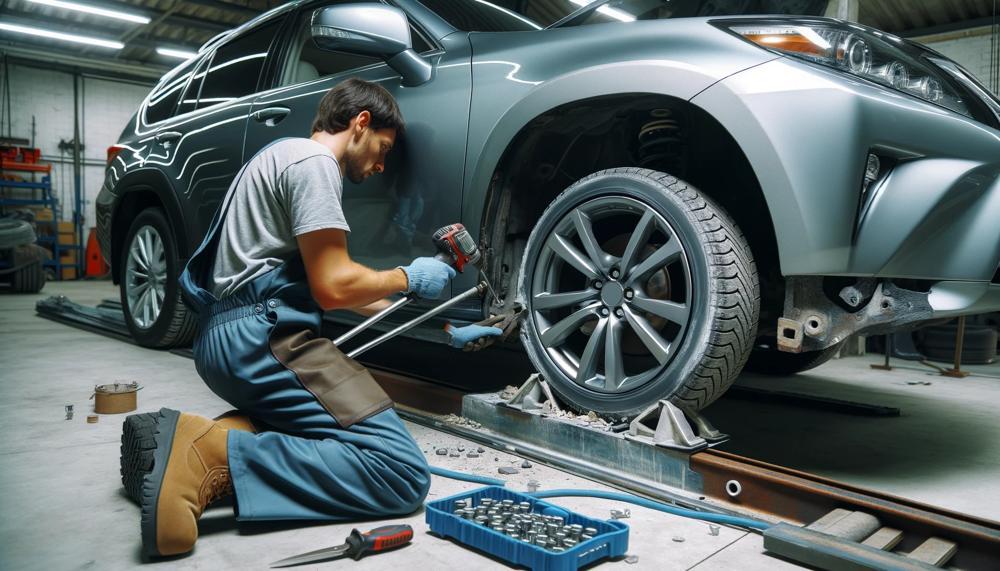
How to Install Rocker Panels Without Welding
To fit rocker panels to your car without the need for welding, follow this practical guide. The process is straightforward and can be accomplished with common tools and materials, ensuring your vehicle remains sturdy and protected from the elements.
Assessment and Preparation:
- Inspect the current state of your rocker panels, looking for signs of rust, corrosion, or structural damage. Severe cases may necessitate professional advice.
- Gather the tools and materials listed below to ensure a smooth operation.
Removal of Old Panels:
- Utilize a pry bar or trim removal tool to detach any plastic trim or moldings carefully.
- Drill out any screws or bolts holding the old panels in place, taking care not to harm adjacent areas or electrical wiring.
Cleaning and Preparing the Area:
- Scrub the exposed area with a wire brush or sandpaper to eliminate rust and debris.
- Apply a rust converter to halt any further corrosion.
Fitting New Rocker Panels:
- Position the new panels, using a rubber mallet to ensure they fit snugly.
- Follow the adhesive application guidelines provided by the manufacturer to secure the panels.
Securing the Panels:
- Drill holes and fasten with screws or bolts as needed, distributing them evenly for a secure fit.
- Employ clamps or vise grips to maintain pressure until the adhesive sets.
Sealing and Finishing:
- Apply a sealant along seams and edges to prevent moisture and debris infiltration.
- Optionally, paint the panels to match your vehicle’s exterior.
Final Checks:
- Ensure alignment and stability by inspecting the fit and testing the panels’ strength.
- A test drive may help in identifying any unusual sounds indicating improper installation.
Materials and Tools Required:
| Tools: | Pry bar, trim removal tool, drill, drill bits, wire brush, sandpaper, rubber mallet, clamps/vise grips |
| Materials: | Rust converter/remover, panel adhesive/double-sided tape, sealant/undercoating, screws/bolts |
This method of installing rocker panels without welding offers a cost-effective alternative while still providing essential protection against rust and damage.
Slip-On Rocker Panels: Attachment Methods And Tools
Attaching slip-on rocker panels is a task that demands precision, the right tools, and a keen eye for detail. The most common methods involve using metal fasteners such as screws or rivets, coupled with adhesive glues to ensure a secure and durable fit.
Here’s how you can get your panels fixed up nice and sturdy:
Common Tools and Materials:
- Drill: For making pilot holes in the rocker panel and the vehicle’s body.
- Rivet Gun: Ideal for attaching panels with rivets, providing a firm hold.
- Screwdriver or Power Screwdriver: To drive screws into place securely.
- Adhesive Glue: A strong, automotive-grade adhesive for extra bonding.
- Clean Cloth: For prepping the surface by removing dirt and grime.
- Sandpaper: To roughen the surfaces slightly, ensuring better glue adhesion.
- Protective Gloves: To keep your hands safe from sharp edges and chemicals.
Attachment Methods:
| Method | Description | Pros and Cons |
| Adhesive Only | Using a strong, automotive-grade adhesive to bond the rocker panel to the vehicle. | Quick and easy, but may not be as durable as methods involving fasteners. |
| Screws | Attaching the panel with screws after applying adhesive for additional support. | Provides a strong hold; however, it requires drilling into the vehicle’s body, which might not be preferable for some. |
| Rivets | Similar to screws, but rivets are used for a permanent attachment. | Extremely durable hold, but more difficult to remove if needed. |
Step by Step:
- Prep the Surface: Clean both the rocker panel and the vehicle surface where it will be attached. Use sandpaper to create a rough surface for better glue adhesion.
- Apply Adhesive: Spread a layer of automotive-grade adhesive on the panel.
- Attach Panel: Place the panel against the vehicle. If using screws or rivets, mark where the holes will be, remove the panel, drill pilot holes, then reapply the panel and secure with the fasteners.
- Secure the Attachment: Use a rivet gun for rivets or a screwdriver for screws to firmly attach the panel. Ensure it’s snug against the vehicle.
- Final Checks: Wipe away any excess adhesive and inspect the panel for secure attachment.
Employing these methods will ensure your slip-on rocker panels are not only attached securely but also stand the test of time, keeping your vehicle looking sharp and protected against the elements.
Preparing The Surface: Removing Rust And Damage
Preparing the surface by removing rust and damage is essential to ensure the longevity and effectiveness of your repair, especially before replacing rocker panels without welding. Here’s a distilled guide to tackle this with finesse and assurance.
Handy Tools and Supplies
Start with gathering the right kit: a quality angle grinder, a wire brush attachment or sanding discs, protective gear (gloves, goggles, mask), rust converter, primer, and quality panel adhesive or fasteners for the no-weld attachment.
Step-by-Step Rust Removal
- Safety First: Gear up in your protective wear to shield against rust particles and debris.
- Scrub Down: Using the wire brush attachment on your angle grinder, vigorously scrub the rusted areas. If the damage is extensive, switch to a sanding disc to cut down to clean metal.
- Finer Touches: For hard-to-reach spots, a hand-held wire brush or sandpaper does the trick, ensuring no rust lurks in corners.
- Neutralise Rust: Apply a rust converter to any remaining spots to halt corrosion. Allow it to cure as per the product instructions.
- Prime Time: Once the surface is clean and dry, coat it with a quality primer to prevent future rust. Let it dry thoroughly.
Choosing the Right Attachment Method
| Method | Pros | Cons |
| Adhesives | Durable, seamless finish | Requires precise application |
| Rivets/Screws | Strong hold, quick | Potential for rust at penetration points |
| Clamps | Non-invasive, adjustable | May not offer a permanent solution |
Installation Steps: Detaching, Cutting, And Cleaning
Replacing rocker panels without welding involves several crucial steps, primarily focusing on detaching, cutting, and cleaning. This process bypasses the need for intricate welding gear, leaning instead on panel adhesive and mechanical fasteners for a robust finish.
| Step | Action | Tools/Supplies Needed |
| Detach | Remove old panel, inspect for damage. | Panel removal tool, gloves, goggles |
| Cut | Measure and cut new panel. | Marker, jigsaw/tin snips, file |
| Clean | Sand, wash, and prime the surface. | Sandpaper, degreaser, primer |
| Attach | Apply adhesive, attach and secure new panel. | Panel adhesive, clamps/weights |
By following these steps, you can successfully replace rocker panels without welding, ensuring a durable and seamless finish while maintaining vehicle integrity and safety.
Mounting Options: Fasteners Or Adhesive?
When it comes to mounting rocker panels without the heat and sparks of welding, you’ve got two main contenders in the ring: fasteners and adhesive. Each brings its own set of tools and tricks to the table, shaping the installation dance and the long haul of durability.
Here’s the lowdown on these two, weighing in on everything from the grunt work needed to get them in place to how they’ll stand up to the tests of time and trials of the road.
| Mounting Method | Installation Grind | Staying Power |
| Fasteners | Heavier on tools, heavier on time. It’s a hands-on hustle, but it’s clear-cut work. | Solid as a rock. It’s metal on metal, bolted tight, but watch for rust sneaking in. |
| Adhesive | Lighter on the tools, heavy on prep. It’s a clean and quiet job, but precision is key. | Slick and sturdy. It’s a bond that braves the elements, but the devil’s in the surface prep. |
Choosing between the two boils down to what you’re after and what you’re working with. Fasteners are the go-to for a no-fuss, robust fix, especially if you’re handy with tools and don’t mind a bit of a tussle. Adhesive is your pick for a sleek finish and a quieter job, but it demands your A-game in prep work.
Finishing Touches: Priming, Painting, And Undercoating
When replacing rocker panels without welding, applying priming, painting, and undercoating serves as a trio of shields, guarding the vehicle’s underbelly against the relentless assault of rust, corrosion, and the barrage of road debris.
This meticulous process ensures the vehicle’s integrity remains uncompromised, maintaining its stalwart stance against the elements and the wear of time.
Key Benefits:
| Priming | Forms a protective layer that halts rust and ensures paint adheres steadfastly to the surface. It’s the first defence, laying the groundwork for durability. |
| Painting | Not just for aesthetics, paint acts as a barrier against moisture and UV rays, contributing to the panel’s resilience and matching the car’s existing hue for seamless integration. |
| Undercoating | A robust shield against road salt and debris, undercoating helps in dampening road noise, thus enhancing the vehicle’s longevity and driving comfort. |
Process Insight:
The preparation is meticulous, beginning with the thorough cleaning and removal of any trace of the old, beleaguered panels. The new battlements, once positioned, are not merely fastened but are treated with a regimen of priming, painting, and undercoating, akin to arming a knight in layers of armour before battle. This trinity of treatments ensures that the panels are not only affixed but are fortified, ready to face the elements with renewed vigour.
In essence, the art of priming, painting, and undercoating when replacing rocker panels sans welding is akin to a meticulous ritual; a rite that bestows upon the vehicle a renewed resilience, ensuring it remains steadfast, not merely in appearance but in structural integrity against the ravages of time and terrain.
Considerations For Durability And Resale Value
To ensure durability and maintain resale value when replacing rocker panels without welding, it’s critical to heed specific considerations. This meticulous approach ensures the vehicle not only retains its aesthetic appeal but also its structural integrity, crucial for its longevity and value. Below, we delve into key factors and benefits, illuminated by examples and a detailed table that encapsulates the essence of these considerations.
| Consideration/Benefit | Details | Impact on Durability and Resale Value |
| Extent of Damage Assessment | Initial step to plan repair | Ensures comprehensive repair, maintaining integrity |
| Cleaning and Preparation | Foundation for replacement | Prevents future corrosion, enhancing longevity |
| Appropriate Replacement Panel | Make and model specific | Maintains original design, crucial for value |
| Alternative Attachment Methods | Adhesive bonding or fastening | Provides strong, heat-free solution |
| Proper Alignment | Essential for fitment and aesthetics | Affects vehicle’s appearance and functionality |
| Safety Equipment Use | Protects against hazards | Ensures a safe and effective replacement process |
| Testing New Panel | Confirms correct installation | Verifies structural integrity and appearance |
By adhering to these considerations, one can ensure the durability of the replacement and maintain, if not enhance, the vehicle’s resale value.
Preparing The Surface: Removing Rust And Damage
To prepare rocker panels for replacement without the need for welding, there’s a straightforward method that ensures the surface is primed and ready for new panels. This method not only tackles the immediate rust and damage but also lays the groundwork for a lasting repair. Here’s how to go about it:
Step 1: Cleaning the Surface
Begin by using a wire brush to scrub away any loose rust and paint. This manual process is vital for reaching the nooks and crannies where rust likes to hide.
Step 2: Sanding for Smoothness
Next, arm yourself with sandpaper—starting with a coarser grit and moving to a finer one. This step is crucial for smoothing out the surface, ensuring that any pits or unevenness left by the rust are effectively dealt with.
Step 3: Applying Rust Converter
Once the area is clean and smooth, apply a rust converter. This chemical solution turns rust into a stable surface that can be painted over, preventing further corrosion and making it an ideal base for the new panels.
Tools and Materials Needed
| Wire Brush | For initial rust removal | Reaches into crevices |
| Sandpaper (Coarse to Fine Grit) | For smoothing the surface | Prepares for rust converter |
| Rust Converter | Prevents further rust | Creates a paintable surface |
This method ensures that the rocker panels are thoroughly prepped, preventing future rust and ensuring that the replacement panels adhere properly. By taking the time to properly remove rust and damage, you not only restore the aesthetic appeal of your vehicle but also its structural integrity and resale value.
Installation Steps: Detaching, Cutting, And Cleaning
When replacing rocker panels without welding, it’s vital to employ the right tools and techniques. This ensures both safety and the longevity of the repair. Here’s a detailed breakdown:
| Step | Tools | Technique |
| Detach Old Panel | Angle Grinder, Hammer, Pry Bar | Cut and pry away old metal |
| Cut New Panel | Drill, Flat Disc on Grinder | Drill and smooth rivet holes |
| Clean and Prepare | 50-Grit Discs, Rust Inhibitor | Sand and apply rust protection |
| Attach New Panel | Fasteners/Adhesive | Align and secure from center to edges |
| Finishing Touches | Sanding, Priming, Filling Supplies | Prepare surface for painting |
Remember, taking time for meticulous cleaning and preparation before attaching the new panel is essential. The durability and effectiveness of the repair depend greatly on these initial steps.
Mounting Options: Fasteners Or Adhesive?
When it comes to mounting rocker panels without welding, the decision between using fasteners or adhesive boils down to the specifics of your project, including desired strength, aesthetics, and future adjustability. Here’s a detailed comparison:
| Criteria | Fasteners (e.g., Rivets) | Adhesive |
| Strength and Durability | Excel in robustness, making them a go-to for rough terrains and high-impact situations. | While strong, they may not always match the sheer resilience of mechanical fasteners under extreme conditions. |
| Aesthetics | May leave visible marks, potentially impacting the sleek look of the vehicle. | Offers a cleaner, more seamless appearance, preserving the vehicle’s smooth lines. |
| Adjustability and Disassembly | Once in place, altering or removing them can be challenging and may cause damage. | Allows for some degree of adjustability and can be easier to remove or reposition if needed. |
| Maintenance and Rust Prevention | Requires vigilance to prevent rust at the attachment points, which could compromise integrity. | Provides a continuous bond that can help seal against moisture, reducing the risk of rust. |
| Installation Process | Demands precision in alignment and drilling, which can be demanding without the right tools. | Requires a clean, properly prepared surface for optimal adhesion, adding steps to the process. |
Finishing Touches: Priming, Painting, And Undercoating
To tackle the task of priming, painting, and undercoating when replacing rocker panels without welding, one must dive into a meticulous process. This journey ensures the longevity and aesthetic coherence of your vehicle.
| Step | Action | Details |
| 1 | Prep Work | After removing old metal and cleaning the area, it’s vital to ensure no rust remains. Grind or sand the area until it’s smooth, employing 50-grit discs for an immaculate surface. |
| 2 | Rust Inhibition | Apply a rust inhibitor or a coat of rust-inhibiting paint generously to the treated area. This step is crucial for warding off future corrosion, ensuring your work stands the test of time. |
| 3 | Panel Attachment | Position the rocker panel precisely, using fasteners and/or adhesive. Start from the centre and move outward, securing the panel evenly to avoid any misalignment. |
| 4 | Surface Smoothing | Apply filler to any uneven areas or gaps, and sand down for a smooth, seamless finish. This preparation is key for a professional look. |
| 5 | Priming | Cover the area with a quality primer, ensuring every nook and cranny is reached. This layer acts as a crucial intermediary, promoting paint adhesion and enhancing rust protection. |
| 6 | Painting | After the primer cures, apply the paint in layers, matching the truck’s colour. Each layer should be thin to avoid drips, allowing sufficient drying time between coats. |
| 7 | Undercoating | Finally, apply an undercoating to the rocker panel area. This protective layer shields against moisture and debris, a guardian against the elements. |
This procedure, though it demands patience and attention to detail, ensures your vehicle not only shines but is protected against rust and wear. By adhering to these steps, the finishing touches on your rocker panels will blend seamlessly with the vehicle’s aesthetic while fortifying its resilience against the elements.
Considerations For Durability And Resale Value
Not welding rocker panels, opting instead for methods like adhesive bonding or mechanical fasteners, can have nuanced impacts on a vehicle’s durability and its appeal in the resale market. Let’s break it down:
Durability Considerations
| Aspect | Impact | Details |
| Attachment Method | Variability in Longevity | Adhesive bonds and mechanical fasteners can provide robustness but may not equal the lifespan of welded joints under identical conditions. |
| Rust Prevention | Crucial for Longevity | Without welding, the emphasis on preventing rust through meticulous surface prep and rust inhibitors becomes paramount, affecting durability. |
| Regular Maintenance | Extended Vehicle Life | Adherence to routine maintenance and undercoating applications can significantly prolong the life of slip-on rocker panels. |
Resale Value Insights
| Aspect | Impact | Details |
| Aesthetic Appeal | Enhanced Market Value | Well-maintained, slip-on rocker panels with impeccable finishes can boost a vehicle’s curb appeal, thus enhancing its resale value. |
| Safety and Integrity | Potential Concerns | Prospective buyers might be wary of the long-term durability and safety of non-welded panels, possibly affecting resale value negatively. |
| Quality of Installation | Crucial for Valuation | Professional, aesthetically pleasing installations with aligned panels and matching paint can mitigate concerns, positively influencing resale price. |
Conclusion
Taking on the task of changing rocker panels without having to worry about welding is a mix of art and science that can help vehicles that are showing signs of wear from time or the weather. We have a long journey ahead of us that goes through the carefully prepared battlefield. We have to remove the last bits of rot, strengthen the base against future rust attacks, and carefully fit the new armor. This guide has a lot of useful information and tools for people who are brave enough to take on the job. It shows them the steps they need to take, from figuring out how bad the damage is to making sure that water or trash can’t get in.
In this journey, we find both old and new methods. For example, screws, which sound like the solid clank of a blacksmith’s hammer, are next to adhesives, which talk about smooth ties and surfaces that can’t be seen. Each option is based on the wielder’s personal taste and strikes a balance between strength, looks, and the vehicle’s safety. By gently pushing the pieces into place, the vehicle’s base changes, but so does its strength and appeal.
This mix of metal, glue, and protection coats not only stops rust from spreading but also makes the car look better, offering a return to both form and function. The car comes out not just fixed, but remade, with parts that look like the originals but are stronger to withstand the wear and tear of time and environment. It shows how skilled people are who are willing to combine old and new ideas, making sure that the vehicle’s history lives on, its value stays high, and its strength stays strong.