In the realm of DIY projects and professional plumbing, the art of soldering copper stands as a cornerstone skill, bridging the gap between mere intention and flawless execution. This transformative technique, which melds pieces of metal with a filler material, is not just about joining pipes; it’s about crafting durability, ensuring longevity, and embracing the craftsmanship that turns a blueprint into reality.
As we delve into the intricacies of this ancient yet ever-relevant craft, we’ll embark on a journey through the essential insights and practical tips that can elevate your soldering from satisfactory to exceptional. Here’s what you’ll discover:
- The Secret Chemistry Behind Soldering: Understanding the materials and reactions at play.
- Tool Mastery: Selecting and wielding the right tools for soldering success.
- Precision Techniques: Step-by-step guidance to achieve seamless joins every time.
- Common Pitfalls and How to Avoid Them: Navigating through the usual challenges with expert advice.
- Advanced Tips for the Seasoned Artisan: Elevating your skills to the next level.
Whether you’re a hobbyist looking to undertake your first project or a seasoned professional aiming to refine your craft, this guide promises to equip you with the knowledge and techniques necessary for mastering the art of soldering copper.
Contents
Acquire Soldering Equipment
To embark on a journey of soldering copper, one must be equipped with the correct paraphernalia. The task isn’t Herculean, yet it demands attention, precision, and the right set of tools. Below is a detailed list of essential tools needed for soldering copper and the best spots to snag them:
| Tool | Description | Where to Acquire |
|---|---|---|
| Propane Torch or Soldering Iron | A device to apply heat directly to copper. A propane torch suits larger pieces; a soldering iron is apt for finer, detailed work. | Hardware stores or specialist online retailers. |
| Flux | A chemical cleaning agent used to prevent oxidation and improve the efficiency of the soldering process. | Hardware stores or online, particularly from sites dedicated to welding and soldering supplies. |
| Solder | A metal alloy used to join together copper pieces once melted. | Available at local hardware stores or through online platforms that focus on electrical or plumbing supplies. |
| Safety Gear (Gloves, Goggles) | Protective equipment to shield hands and eyes from heat and stray materials. | Can be found in any safety equipment store or general hardware stores. |
| Cleaning Supplies (Sandpaper, Wire Brushes) | Used for prepping the copper surface by removing any impurities or oxidation. | Available in hardware stores or online marketplaces. |
| Fittings (if joining pipes) | Copper pieces such as elbows or tees that help in joining sections together. | Plumbing supply stores or larger general hardware stores. |
Remember, prior to embarking on your soldering voyage, it’s vital to clean the copper meticulously using sandpaper or a wire brush. This removes any oxide layer, ensuring the flux and solder can do their job properly. It’s also wise to practice on spare materials to refine your technique.
While setting out to acquire these items, look for quality and longevity in products. Local hardware stores often provide a wide range of soldering tools and materials. For more specialised items, online retailers dedicated to welding and soldering equipment can offer a broader selection.
Always heed safety warnings and wear appropriate gear to shield yourself from harm. Soldering involves high temperatures and requires undivided attention and respect for the tools at hand.
Adhere to Important Safety Considerations
When delving into the world of soldering copper, safeguarding oneself and one’s surroundings is not just wise; it’s imperative. Here’s what you need to keep at the forefront of your mind:
Ventilation and Workspace:
- Always solder in a well-ventilated space to avoid inhaling noxious fumes.
- Keep your workspace free from clutter and flammable materials to reduce the risk of accidents.
Protective Gear:
- Don a pair of safety goggles to shield your eyes from hot splatters.
- Use heat-resistant gloves to protect your hands from burns and cuts.
- Wear a mask if you’re concerned about inhaling fumes, especially in less ventilated areas.
Tool Safety:
- Ensure your soldering iron or torch is in good working condition before starting.
- Never leave the soldering iron unattended while it’s hot.
- Place the soldering iron on its stand when not in use to avoid accidental burns.
Handling Materials and Tools:
- Handle hot materials with care, using the proper tools to avoid direct contact.
- Be mindful of the soldering iron’s cord to prevent tripping or entanglement.
First Aid and Accident Preparedness:
- Have a first aid kit handy for minor injuries.
- Know how to treat burns – run cool (not cold) water over the affected area and cover with a clean, dry cloth.
- If a serious injury occurs, seek medical attention immediately.
Post-Soldering Clean-Up:
- Let the soldering iron cool completely before storing.
- Wash your hands thoroughly after soldering to remove any residues.
- Properly dispose of any waste materials, adhering to local disposal regulations.
Strip Wire Insulation (If Necessary)
Determining whether to strip wire insulation before soldering copper hinges on several key factors, critical for ensuring a robust soldering connection. Delve into the specifics to ensure your soldering project’s success.
Check Wire Type:
Inspect whether you’re handling solid or stranded copper wires. Solid wires often don’t need stripping for soldering since the solder adheres smoothly to their continuous surfaces. Conversely, stranded wires, composed of multiple fine strands, require stripping to expose each tiny strand, essential for a secure bond.
Assess Insulation Thickness:
Gauge the thickness of the wire’s insulation. Thick insulation can act as a barrier, preventing solder from adequately bonding with the copper.
If the insulation feels notably bulky, stripping it back is advisable to enable direct contact between the solder and the copper wire.
Evaluate Insulation Material:
Consider the wire’s insulation material. Materials like PVC or nylon, with higher melting points than copper, won’t conveniently melt away during soldering. If your wire’s insulation is made from such materials, stripping is necessary to avoid poor solder connections.
| Factor | Check Needed | Action |
| Wire Type | Solid or Stranded | Strip if stranded |
| Insulation Thickness | Thin or Thick | Strip if thick |
| Insulation Material | PVC, Nylon, etc. | Strip if high melting point materials |
In sum, stripping wire insulation before soldering copper is determined by the wire’s form, the bulkiness of insulation, and the insulation’s composition.
Intertwine Copper Wiring to Rejoin Materials
To effectively intertwine copper wiring for soldering, follow these guidelines:
Materials Required:
- Copper wires
- Soldering iron
- Solder (filler metal)
- Damp sponge
- Heat shrink tubing
Steps for Intertwining:
Preparation:
- Strip the insulation off the ends of the copper wires to expose the bare wire.
- Ensure wires are clean and free of oxidation.
Twisting Wires:
- Align the stripped ends of the wires side by side.
- Twist them together firmly but gently to avoid breaking.
Applying Solder:
- Heat the soldering iron.
- Hold the intertwined section with tweezers or a clamp.
- Touch the soldering iron to the copper, not directly to the solder.
- Feed the solder until it flows around the wires.
Cooling and Insulation:
- Allow the solder to cool naturally.
- Slide heat shrink tubing over the soldered area for insulation.
Safety Precautions:
- Work in a well-ventilated area.
- Avoid inhaling fumes.
- Use the soldering iron carefully to prevent burns.
| Step | Details | Safety Tips |
| Preparation | Strip insulation, clean wires | Ensure wires are dry and clean |
| Twisting Wires | Align and twist wires together | Gentle twisting to avoid wire damage |
| Applying Solder | Heat iron, apply solder to wires | Avoid direct contact with the iron |
| Cooling and Insulation | Let solder cool, apply tubing | Ensure solder is fully cooled |
| Safety Precautions | Well-ventilated area, careful use | Avoid fume inhalation, prevent burns |
When intertwining copper wires, it’s important to balance firmness and gentleness. Over-twisting can break the wires, while too loose a twist results in a weak joint. The solder should flow naturally without forcing it.
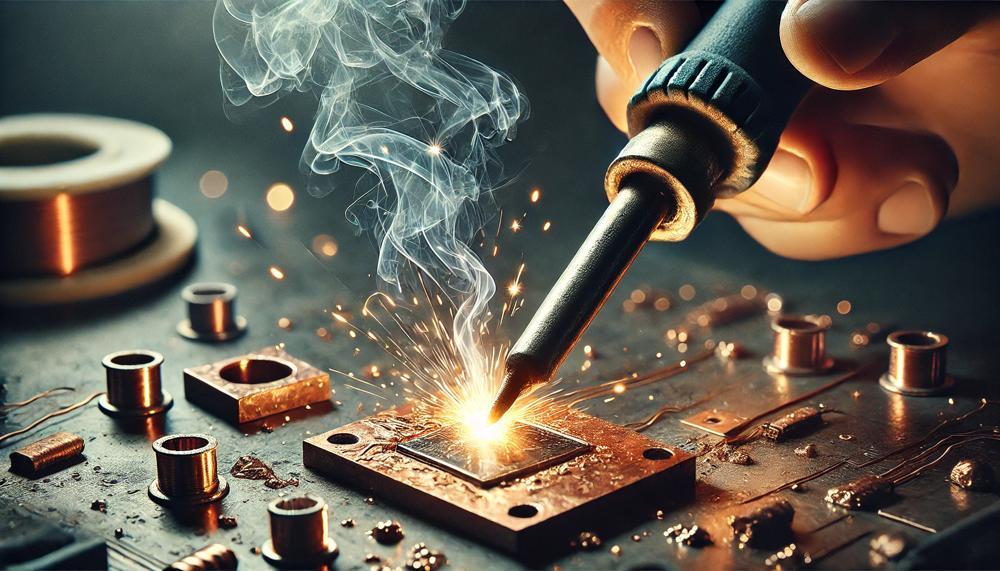
Heat Soldering Iron
Heating a soldering iron for soldering copper requires precision and care. Here’s a detailed guide:
Cleaning the Iron:
- Why: Residue on the iron’s tip impedes heat transfer.
- How: Wipe the tip with a damp sponge or cloth before use.
Setting the Right Temperature:
- Ideal Temperature: 400-450°F (200-230°C).
- Method: Use a temperature-controlled iron or a thermometer for non-adjustable irons.
Tinning the Tip:
- Purpose: Enhances heat transfer and prevents oxidation.
- Process: Melt a small amount of solder onto the tip, then spread evenly.
Positioning the Iron:
- Angle: Hold the tip at 45 degrees to the joint.
- Contact Points: Ensure the tip touches both the copper and the component.
Avoiding Overheating:
- Sign: Copper turning red.
- Action: Remove the iron and let the copper cool.
Here’s a table summarizing the process:
| Step | Detail | Importance |
| Cleaning the Iron | Wipe with a damp sponge or cloth | Ensures efficient heat transfer |
| Setting the Right Temperature | 400-450°F (200-230°C) | Optimal temperature for soldering copper |
| Tinning the Tip | Melt and spread solder | Improves heat transfer and prevents oxidation |
| Positioning the Iron | 45-degree angle, contact both copper and component | Ensures even heat distribution |
| Avoiding Overheating | Watch for copper turning red | Prevents damage to copper and components |
Remember, patience is key in heating the soldering iron correctly.
Apply Soldering To Copper Wire
To tackle the task of soldering copper wire—a skill that marries precision with patience—you’ll need a kit brimming with specific tools and materials. Here’s your arsenal for ensuring a solid, reliable join every time you bring heat to metal.
| Tool/Material | Use | Why It’s Essential |
| Soldering Iron | Heats the solder | A precise tip offers control and direct heat where it’s needed without damaging surrounding areas. |
| Solder | Binds the copper wires together | A good quality solder ensures a conductive, durable bond; often, a rosin-core solder is recommended for its ease of use. |
| Wire Strippers | Prepares the wires for soldering | Clean, precise removal of insulation without nicking the copper wire is crucial for a good solder joint. |
| Damp Sponge or Brass Wool | Cleans the soldering iron tip | Keeps the tip free of old solder and impurities, ensuring optimal performance and heat transfer. |
| Heat Shrink Tubing | Insulates the soldered joint | Provides a neat, insulated finish that protects the connection from short-circuiting and environmental factors. |
| Heat Gun or Lighter | Applies heat to shrink the tubing | Ensures the heat shrink tubing is snugly secured around the soldered joint, offering protection and insulation. |
By amassing these tools and materials, you equip yourself not just for the job at hand but for a craftsmanship that echoes the reliability and integrity of your work.
Reinsulate Wiring with Heat Shrink Tubing
Heat shrink tubing serves as a steadfast ally in the quest to reinforce and protect wiring, especially when soldering copper. This technique isn’t just about making connections robust; it’s about shielding them from the elements and stress, ensuring they stand the test of time and use. Let’s delve into the specifics:
Application in Soldering Copper Wires:
- Insulation and Protection: After soldering copper wires, slipping heat shrink tubing over the joint and applying gentle heat snugly seals the deal. This isn’t just about covering up; it’s about creating a barrier against heat, moisture, and dirt. Imagine it as a safeguard, keeping the nemesis of corrosion and short circuits at bay.
- Strain Relief: It’s a bit like wrapping your prized connections in a protective hug. The tubing absorbs tension and stress that could otherwise wreak havoc on your soldered joints. It’s about making sure that what’s connected stays that way, no matter the shakes, rattles, or rolls.
- Choosing the Right Armor: It’s not a one-size-fits-all deal. Picking the correct diameter and material of heat shrink tubing is crucial. Polyolefin, a material revered for its durability against heat and chemicals, and its flame-retardant nature, often takes center stage. It’s about matching your protective gear to the battle conditions.
Here’s a glance at how to match tubing to your needs:
| Aspect | Consideration | Why It Matters |
| Size | Fit snugly over the joint | Too loose, and it won’t protect; too tight, and it won’t fit. |
| Material | Polyolefin for electrical tasks | Heat resistance and flame retardancy ensure safety. |
| Application Heat | Use a heat gun or lighter carefully | Ensures uniform shrinkage without damaging the wire. |
In essence, heat shrink tubing isn’t just a component; it’s the protector of your electrical connections. By carefully selecting and applying this tubing, you’re not only reinforcing your soldered joints but also shielding them against potential adversaries. Whether it’s the harshness of the environment or the physical stress of use, your connections remain secure, insulated, and protected.
Soldering Copper Wire Efficiently
Soldering copper wire efficiently hinges on meticulous preparation, precise technique, and the correct use of materials. Below are strategic tips to enhance your soldering process, ensuring robust and reliable connections.
Essential Preparation
- Strip and Clean: Ensure the copper wire is impeccably clean and stripped of insulation for about 1-2 cm at the ends. A pristine surface improves solder adhesion.
- Twist Wires Together: For a solid connection, intertwine the wire strands neatly. This increases the mechanical strength of the joint before soldering.
- Use a Helping Hand: A “helping hand” tool can stabilize the wires, freeing both of your hands to manage the solder and iron.
Selecting the Right Tools and Materials
- Choose the Right Solder: For copper wire, a tin-lead solder with a flux core (60/40 rosin core) is ideal, providing a good balance between melting temperature and strength.
- Proper Soldering Iron: A variable temperature soldering iron allows you to adjust the heat for different wire gauges. A tip temperature around 350°C is typically effective.
- Safety Gear: Wear protective glasses and work in a well-ventilated area to safeguard against fumes and splatters.
Soldering Technique
- Heat Both the Wire and Solder: Touch the soldering iron tip to both the copper wire and the solder, not the iron directly. This ensures the solder flows and wicks around the wire strands uniformly.
- Apply Solder Sparingly: Too much solder can create bulky, conductive blobs. Apply just enough to cover the wires in a thin, even layer.
- Cool Naturally: Allow the solder joint to cool down without blowing on it. Rapid cooling can weaken the joint.
Insulation and Protection
- Use Heat Shrink Tubing: After soldering, slide heat shrink tubing over the joint and apply gentle heat to seal. This step is critical for insulating and protecting the soldered connection from environmental factors.
Optimizing Your Soldering Workspace
| Item | Function | Importance |
| Soldering Iron Stand | Securely holds the iron when not in use | Prevents accidents and surface damage |
| Flux | Improves solder flow and reduces oxidation | Essential for a clean, strong bond |
| Wet Sponge | Cleans soldering iron tip | Keeps the tip free from buildup |
Embracing these tips ensures not only a swift and efficient soldering process but also guarantees durable and conductive connections, vital for any project involving copper wire.
Conclusion
Soldering copper, a practice steeped in both tradition and innovation, is a testament to the enduring craftsmanship that underpins not only professional plumbing but a myriad of DIY projects. At its core, soldering is not merely about connecting metal pieces; it’s about forging strength, ensuring reliability, and embodying the precision that transforms ideas into tangible realities. The journey through learning to solder copper is rich with insights, from selecting the right tools to mastering precise techniques, each step pivotal in achieving seamless, durable joins.
This exploration reveals the deep chemistry behind soldering, emphasizing the importance of understanding the materials and their reactions. Tool mastery is highlighted as critical for success, underscoring the need to choose and wield soldering equipment with care. Precision techniques are demystified, offering step-by-step guidance to perfect the art of soldering, while common pitfalls are addressed, providing strategies to navigate challenges. For the seasoned artisan, advanced tips promise to elevate skills further, showcasing soldering as an art that balances delicacy with strength.
Whether embarking on your first soldering project or seeking to refine your expertise, the guide illuminates the path to mastering soldering copper.