Forge welding is an old art form that holds a special place in the world of metalwork. It shows how creative people were long before electric welders came along. Think of the clinking sound of a blacksmith’s hammer, the glow of red-hot metal, and the pleasure of using only heat and pressure to join two pieces of metal together.
This isn’t a scene from the past; people all over the world use this skill every day and do it very well.
Learning how to forge weld without a traditional welder can open up a lot of doors for you, whether you’re a student interested in traditional welding techniques or a professional looking to add to your skills.
In this blog post, we’ll dive deep into the heart of forge welding, exploring how you can master this time-honored technique with tools you might already have at your fingertips. Here’s what you’ll learn:
- The Basics of Forge Welding: Grasping the core principles behind this ancient technique.
- Setting Up Your Forge: How to prepare your workspace and what tools you’ll need to get started.
- Heat Management: Tips and tricks for achieving the perfect temperature for different types of metals.
- The Welding Process: Step-by-step guidance on how to execute a forge weld, from heating to hammering.
- Troubleshooting Common Problems: Solutions to common challenges you might face along the way.
By the end of this journey, you’ll not only have a solid understanding of how to perform forge welding without a traditional welder but also appreciate the craftsmanship that goes into every hammer strike and heat cycle. So, grab your apron, light up your forge, and let’s get started on rediscovering the art of forge welding.
Contents
What is Forge Welding?
Forge welding, an age-old metal joining craft, stands out as a distinct technique from modern welding methods. This venerable skill, rooted in history and artisanship, demands dexterity and understanding beyond the simplicity of contemporary methods.
Forge Welding Defined:
At its core, forge welding melds two metal pieces by heating and then forcefully uniting them with a hammer or press.
This process, harkening back over millennia, diverges sharply from today’s fusion-based techniques, as it occurs below the melting point of the metals involved.
Contrasting Forge and Traditional Welding:
| Aspect | Forge Welding | Traditional Welding |
| Process | Heating followed by hammering | Heating to liquid state and fusing |
| Temperature | 60-70% of melting point | At or above melting point |
| Material State | Solid-state diffusion bonding | Liquid state fusion |
| Equipment | Forge, anvil, hammer | Welding machine, electrodes |
| Skills Required | High manual dexterity | Technical knowledge of machinery |
| Applications | Blacksmithing, custom metalwork | Industrial, construction |
Unique Characteristics of Forge Welding:
- Craftsmanship: Demands a blend of strength, precision, and timing, akin to an artisan’s touch.
- Visual Seamlessness: Yields a homogenous piece without visible joints or seams.
- Strength: Often creates stronger bonds due to maximum surface contact.
- Flux Usage: Typically uses materials like borax to shield metal from impurities during heating.
What Materials Are Ideal for Forge Welding Without a Welder?
Ideal materials for forge welding without a traditional welder include Canister Damascus powder, mild steel, and wrought iron. These materials are preferred for their malleability, compatibility, and ease of use in the forge welding process.
Each material has distinct characteristics and requires specific precautions and techniques for effective welding.
Preferred Materials for Forge Welding:
| Material | Features | Why It’s Ideal |
| Canister Damascus Powder | Contains integrated flux; prevents oxidation | Flux in the powder aids in preventing impurities, making it ideal for strong, clean welds. |
| Mild Steel | Easy to work with; low carbon content | Its forgiving nature makes it suitable for beginners and ensures reliable results. |
| Wrought Iron | High malleability; ductility | Known for its workability under heat, allowing for easier welding and shaping. |
Crafting Considerations:
- Heat Monitoring: Overheating or underheating can ruin the weld. Techniques like using a magnet or observing the metal’s color can guide you to the correct temperature.
- Safety First: Donning protective gear and ensuring proper ventilation in your workspace is a must to avoid accidents.
- Prep Work: Thoroughly clean and properly heat the metals prior to welding to ensure a clean, strong weld.
Forge welding stands out as a craft honed through time, requiring patience and practice. The simplicity and ruggedness of mild steel, the adaptability of wrought iron, and the innovative composition of Canister Damascus powder provide a broad canvas for artisans.
How to Prepare the Metal Pieces for Forge Welding
To properly prepare metal pieces for forge welding without a welder, follow these critical steps for a successful bond:
| Step | Action | Details |
| Choose Metal | Opt for suitable metal | Canister damascus, mild steel, and wrought iron are prime choices. |
| Clean Metal | Remove impurities | Employ a wire brush or sandpaper to scrub away rust, dirt, and contaminants. |
| Cut Metal | Size it right | Use a hacksaw or angle grinder for precise cuts and smooth edges. |
| Heat Metal | Softening in forge | Warm up the metal in a forge till it’s pliable but not melting. |
| Apply Flux | Enhance bonding | Flux prevents oxidation and encourages a stronger weld. |
| Monitor Heat | Keep an eye on temperature | Use a magnet or color chart for accurate heat management, avoiding overheating. |
| Hammer Metals | Join with precision | Begin with gentle taps, increasing force, to merge metals on an anvil. |
| Safety First | Wear protective gear | Ensure your safety with appropriate attire and work in a space with ample ventilation. |
Forge welding is a skillful art that combines heat, timing, and physical effort to fuse metal. Mastering these steps, especially the heating and hammering techniques, is crucial.
How to Heat the Metal Pieces in the Forge
When you’re keen to join metal pieces in the forge sans a welder, it’s all about harnessing heat with finesse and skill. Here’s the lowdown on turning up the heat, ensuring your metal merges just right.
Traditional Coal or Gas Forge
The bedrock of blacksmithing, using coal or gas, offers a tried-and-true method to get your metal glowing. Here’s how they stack up:
| Coal Forge | Stoke the fire to spread the heat, aiming for a bright, consistent glow across your metal. |
| Gas Forge | Tweak the gas flow for an even temperature, ensuring the entire piece soaks in the warmth evenly. |
Oxy-Acetylene Torch
A more surgical approach to heating, this torch lets you pinpoint heat with precision. Just keep a steady hand to avoid overheating:
| Heat Concentration | Direct the flame for targeted heating, perfect for focusing on specific join areas. |
Induction Heating
Step into the future with electromagnetic fields that evenly bathe your metal in warmth, no direct flame needed. It’s magic, almost:
| Even Heating | Enjoy uniform temperature distribution, crucial for consistent welds. |
Propane Torch
No forge? No problem. A propane torch can get you by in a pinch, heating small sections for quick forge welding:
| Accessibility | A go-to for those starting out or working in limited spaces. |
Hot Coals from Campfire
Old school but effective. If you’ve got the knack for keeping the coals at just the right temperature, you can weld with the best of them:
| Rustic Technique | Perfect for those who prefer a more natural, hands-on approach. |
Remember, each piece of metal tells its own tale. Pay heed to its glow, feel its heat, and listen as it tells you when it’s ready to merge with its mate.
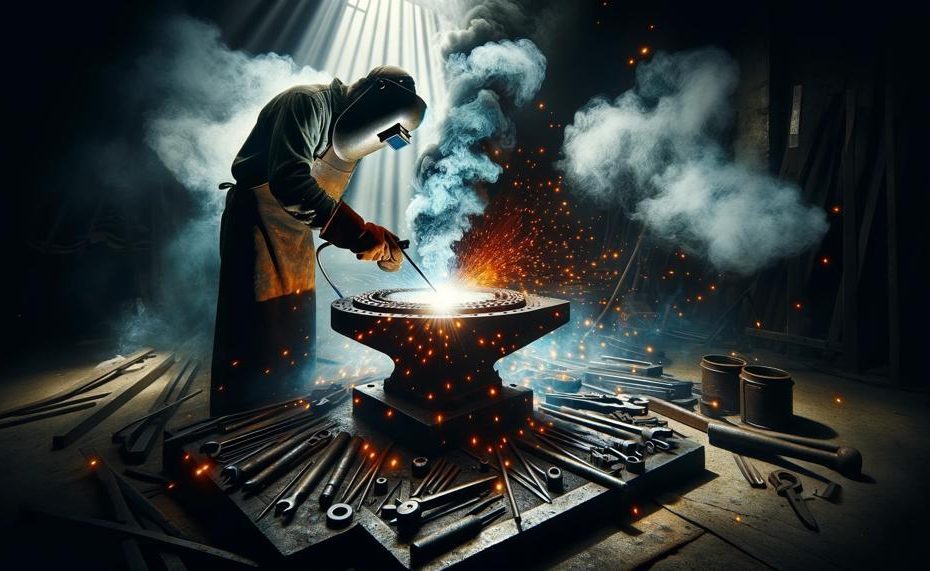
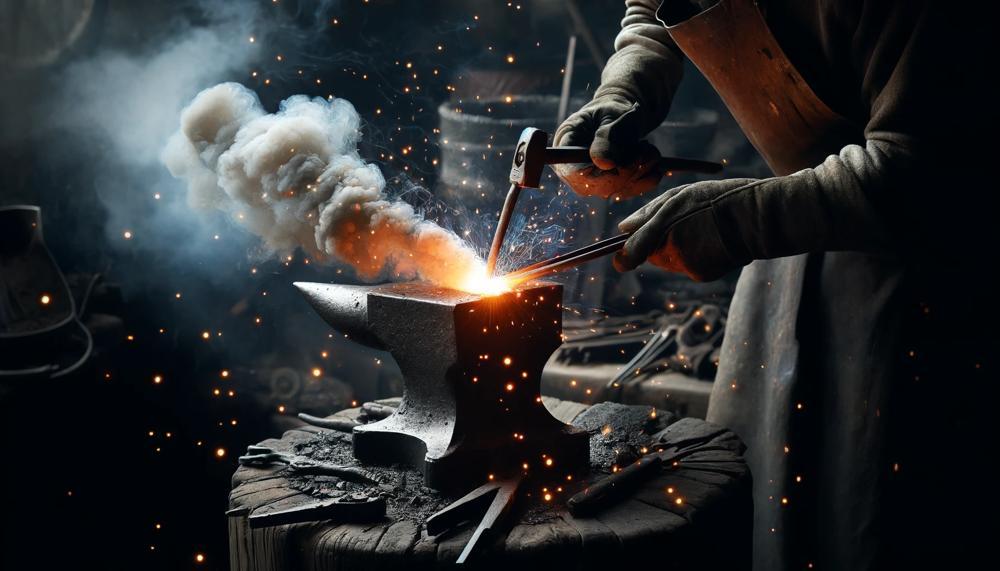
Hammering the Metal Pieces Together on an Anvil
Forge welding, a time-honored craft, demands precision and patience. To effectively join metal pieces on an anvil, follow these guidelines:
- Preparation: Clean the surfaces to be joined, ensuring they’re free from dirt, rust, or coatings. This enhances the fusion process.
- Heating: Heat the metal in a forge to a bright yellow heat, approximately 50-90% of the metal’s melting point. Uniformity in temperature is key.
- Flux Application: Apply flux, like borax, to prevent oxidation. This step is crucial to protect the metal and facilitate bonding.
- Positioning on Anvil: Place the heated pieces on the anvil, aligning them for the weld.
- Hammering Technique: Start with gentle taps to align and set the pieces together, then increase the force of the blows. The initial light taps reduce the risk of misalignment, while the subsequent firmer strikes create the diffusion bond.
- Visual and Auditory Cues: Watch for a spark-like effect and listen for a change in the sound of hammering, indicating a successful bond.
- Finishing: Reheat if necessary, and hammer to refine the shape and ensure a smooth, continuous weld.
Remember, each metal responds differently. Practice and experience are invaluable in mastering this skill.
| Step | Action | Purpose |
| Preparation | Clean the metal | Ensures a clean bonding surface |
| Heating | Heat to bright yellow heat | Prepares metal for plastic deformation |
| Flux Application | Apply borax or similar flux | Protects metal from oxygen and impurities |
| Positioning on Anvil | Align the heated pieces | Sets the stage for welding |
| Hammering Technique | Gentle taps, then firmer blows | Starts and solidifies the bonding process |
| Visual and Auditory Cues | Observe and listen | Indicates a successful weld |
| Finishing | Reheat and hammer as needed | Refines and completes the weld |
Forge welding, while ancient, remains a testament to the enduring power of skillful handcrafting.
Monitoring Heat During the Process
Monitoring heat accurately during the forge welding process is a skill as timeless and robust as the craft itself. Forge welding, an ancient technique, demands a keen eye, a steady hand, and an understanding of metal’s behavior under heat. Let’s delve into the methods that ensure your work’s integrity and beauty without the modern convenience of a welder.
Using a Magnet to Gauge Temperature
A magnet offers a simple yet effective way to test if the metal has reached the non-magnetic state, indicating it’s ready for welding. When steel reaches approximately 760°C (1400°F), it loses its magnetic properties—a clear signal it’s at the right temperature for forge welding.
| Step | Action | Benefit |
| 1 | Approach the heated metal with a magnet. | Immediate, no-contact temperature check. |
| 2 | Test for magnetic attraction. | Identify the precise moment for welding. |
| 3 | Remove magnet as soon as metal becomes non-magnetic. | Prevents overheating, ensuring optimal weld quality. |
Visual Inspection with a Color Chart
A color chart is your roadmap to understanding the heat levels of your metal. As the metal heats, it transitions through a spectrum of colors—starting from a dull red and moving through bright orange to a white-hot state. Each hue marks a specific temperature range.
| Color | Temperature (°C) | Welding Stage |
| Bright cherry red | 750 – 800 | Starting forge welding temperature |
| Orange | 800 – 900 | Ideal for most forge welding |
| Yellow | 1000 – 1100 | Maximum temperature before risking burn-off |
Safety First: Protective Gear
In the dance with fire and metal, safeguarding oneself is paramount. Ensure you’re clad in protective gloves and eyewear. These aren’t just tools; they’re your armor against the forge’s fury, allowing you to work closely with the metal without harm.
Temperature Management: Avoid Overheating and Underheating
The key to a successful weld lies in striking the perfect temperature balance. Too hot, and your metal might burn, becoming brittle and unusable. Too cold, and the pieces won’t fuse. Patience and attention to your metal’s heat are your best allies here.
Take Breaks for Cooling
Just as a marathon runner needs rest, so too does your equipment and yourself. Regular breaks prevent overheating, ensuring both you and your forge can perform at your best throughout the welding process.
In the world of forge welding, the blend of art and science becomes vividly apparent.
Conclusion
Forge welding is an old art form that is more than just joining metal together. It is a dance of fire, metal, and human creativity. Without using modern welding, this craft lets both amateurs and pros get back to the basics of metalworking. Each hammer hit and heat cycle combines strength, precision, and imagination. Preparing your area, carefully controlling the heat, and learning how to bang on an anvil are all things that connect you to the past and embrace methods that have changed the history of human workmanship.
Forge welding is more than just putting metals together. It’s also a way to keep alive a practice that shows off the beauty of handiwork and a deep understanding of materials like Canister Damascus powder, mild steel, and cast iron. Using flux, keeping an eye on the right temperature, and using exact hammering methods can lead to strong, smooth bonds that look like old metals and last a long time.
You need to be very skilled with your hands and have a lot of respect for the object and the process in order to do this craft. From picking out the right materials to the last hammer blow, every step shows how skilled and dedicated the welder is. Forge welding is more than just a way to put metals together; it’s a way to enter a world where fire, metal, and the human spirit come together to make lasting works of art.